Search My Blog

Showing posts with label apples. Show all posts

Sunday, May 25, 2014

Healthy, Veggie Packed Muffins for Baby (and mama!)


So, my little one is 8 months old! Wow, time sure does fly. And everyday, she is more and more interested in food and feeding herself. But she's not quite eating what we eat yet. I am still trying to limit the salt and added sugars and make sure she gets her fair share of veggies and whole grains.

The other challenge is that we seem to always be on the run. Which means we always need to bring snacks. So far, I have managed to stay away from pre-packaged snacks, but it's hard because I want something that is easy to make, is readily available when I need it, not too messy, and most of all, healthy. So I started making baby muffins.

Baby muffins are great because you can make a massive batch and freeze them. Whenever you need to take one on the run, pop it into a snack bag and by the time you are ready to eat it, the muffin will be thawed. They are easy for baby to eat because they aren't too slippery and messy, and they are easy for mama to clean when bits get dropped everywhere (which they definitely will!).

There are lots of options of what could be added to these muffins. I have a list of things I want to try like quinoa, pureed peas, apples, lentils, pumpkin.... etc and I promise to share as I make them! But for now, here is the first batch. Oh, and even though there is no fat, sugar or salt, I am sure you will find yourself eating them too!

Tuesday, June 26, 2012

Apple, Craisin & Walnut Galette


So a galette is pretty much a free form pie. Okay, it's a lazy pie. It's all the deliciousness of a pie crust and the filling, without having to make it fit the pie tin and making a top crust. 

Having said that, I don't feel the slight bit guilty for making a galette. In fact, it's the perfect, quick, rustic end to a home cooked meal and it seems much less work and much less daunting than making a pie. You can fill it with whatever your heart desires, or whatever you have just kicking around in your fridge. Some great examples would be frozen fruit tossed in some cornstarch and sugar, some fresh sliced peaches or apricots, or a thick spread of your favorite jam.

Oh, and the best part is, there is no leftover, wasted dough. Nope, you roll it all out, put on your filling, and just fold it over. Easy as pie!

Apple, Craisin & Walnut Galette
Makes 1 Galette

For Whole Wheat Pastry Crust
1 1/4 cups Whole Wheat Flour
1/8 tsp Salt
1/2 cup Butter, cut into cubes
3 tbsp Ice Water
(**In this case, I made a whole wheat pastry crust, but you could use a the same recipe with white flour)

1 Egg beaten with 1 tsp of water (Eggwash)

For Filling
2 Apples, sliced
Zest and Juice of 1 Lemon
1/2 cup Walnut Pieces
1/3 cup Craisins
1/4 cup Brown Sugar
3 tbsp Plain Yogurt
2 tbsp Butter

Preheat oven to 375 degrees Fahrenheit.

Make Pastry Crust
In a food processor, mix together flour and salt. Add butter and pulse until the mixture resembles a course meal. Slowly add the ice water, pulsing just until the dough starts to stick together in a ball. Remove the dough from the processor, form into a ball, wrap in plastic wrap and refridgerate for at least 30 minutes before rolling out.

Filling and Baking
In a bowl, stir together apples, lemon juice and zest, walnuts, craisins and brown sugar.

Roll out pastry dough to about 1/4 cm thickness. Place on a a parchment or greased baking sheet. Put the yogurt on the dough and spread in the centre, leaving a 2 inches border around the edge of the crust clear. Place the apple mixture on top of the yogurt. 

Rustically fold over the borders of the pastry (about 1 to 1 1/2 inches all around), pressing down to seal it around the filling. Brush with the egg wash. Place spots of the butter onto the filling. Bake for 35-40 minutes until golden brown and bubbly.

Thursday, March 15, 2012

Whole Wheat Apple Bran Muffins


Breakfast is always a routine during the week. Not much thought... just the same actions everyday.  But sometimes, it's nice to shake things up a little. This doesn't mean waking up early, breaking out the pans, the eggs, the mess and cooking up a storm. It just means thinking about breakfast in advance and doing some relaxed cooking or baking the day before.

The perfect breakfast treat? Muffins. And I am not referring to those gigantic, fat and sugar laden ones that you buy at the coffee shop on the way to work. I mean homemade muffins. Granted, there are some healthy store bought ones now, but nothing beats the ones you make at home. They are actually very easy and quick to make, and are the perfect break from the daily grind.

Saturday, November 26, 2011

Chicken Stew with Acorn Squash & Quinoa


So, I went a little quinoa crazy last month and bought a couple of huge bags of organic quinoa because they were such a great deal. What I failed to consider is what I was going to do with all of this quinoa.  I already felt that I had exhausted all quinoa salad possibilities (okay, don't get me wrong... I love quinoa salad like this one with chicken and apple, but, well, you can't eat it everyday) and was just getting sick of the same old quinoa preparations.

So then I made these Sundried Tomato and Olive Quinoa Cakes which I have to admit, renewed my interest in the whole quinoa thing. However, it still didn't help in reducing my massive pantry stash of quinoa.  I had to keep looking.

Then, I came across a recipe by the Cookin Canuck. Hmm.... a stew with quinoa? Had to be worth a shot. So, I modified the recipe a little according to what I had around, and made an acorn squash, chicken, quinoa stew. And it was surprisingly fantastic! I kinda thought that the quinoa would turn to mush, but it really manages to hold it form and texture. And the olives gave a great saltiness to each bite. Really, it was phenomenal. And another quinoa recipe to add to my repertoire.

Chicken Stew with Acorn Squash & Quinoa
Adapted from recipe from www.cookincanuck.com
Serves 6

1 Acorn Squash, peeled, seeded & chopped into 1/2-inch pieces
3 1/2 cups chicken broth
1 1/2 lb. boneless, skinless chicken thighs
1 tbsp olive oil
1 medium yellow onion, finely chopped
1/2 tsp kosher salt
4 cloves garlic, minced
1 1/2 tsp dried oregano
1 can (14 oz) petite diced tomatoes
2/3 uncooked quinoa
3/4 cup pitted kalamata olives
Freshly ground black pepper, to taste

Heat olive oil in large saucepan over medium heat. Add onions, garlic, oregano and squash and sautee for a few minutes. Add about 1/4 cup of water, cover, and let steam for about 5-8 minutes, until squash just starts to soften.

Add chicken and broth. Cover and let simmer for another 8-10 minutes.

Stir in the tomatos and quinoa. Cover and cook for another 15 minutes.

Pull out the chicken, remove the bones, and shred.
Stir the chicken, olives and pepper into the stew and simmer, uncovered, to heat, about 5 minutes.

Tuesday, July 12, 2011

Summer Quinoa Salad with Chicken & Apple


Nothing says summer like barbeques, picnics on the beach, and tasty, light summer food.

This salad is great because it is both a fresh and light accompaniment to any meal, or a healthy summer lunch or dinner! I love quinoa, but you could use couscous, bulgar, rice or even pasta in this recipe, and it would be fantastic.

I like to make this salad one evening for dinner, and keep the leftovers for lunch the next day! The perfect tasty timesaver!

Summer Quinoa Salad with Chicken & Apple
Serves 4

1 1/2 cups Quinoa
3 cups Water
4 Chicken Thighs, boneless and skinless
Juice and Zest of 1 Lemon
1 Large Apple, peel on, diced small (I used a Fuji apple but you can use whatever you have)
2/3 cup Yogurt
1/2 Red Onion, diced small
1 Zuchinni, peel on, diced small
1 can Black Beans, rinsed and drained
1/2 cup Raisins
1/2 cup Cilantro, chopped
Salt and Pepper

Place the quinoa and the water in a saucepan over medium-high heat. Bring to a boil, reduce to a simmer, cover and cook for about 12 minutes until the water is soaked up. Remove from heat and let sit for another 10 minutes or so. Fluff with a fork.

Season the chicken thighs with salt and pepper. Place in a pan over medium heat with a drizzle of oil and cook for about 4 minutes on both sides until cooked through. Let cool then shred with your hands.

In a large bowl, mix together lemon juice and zest and chopped apple. Stir in the yogurt. Add the onions, zuchinni, black beans, raisins and cilantro. Season to taste with salt and pepper.

Wednesday, March 16, 2011

Chicken Waldorf Salad


Waldorf Salad is a classic combination of apples, grapes, celery and walnuts in a creamy dressing.

Over the years, everyone has made their own version, and this is mine. It is pretty simple and stays very close to the classic Waldorf. However, since I made this the meal for two, I added some chicken.

Now, let's talk about the chicken for a moment. Most of the time, salads using chicken use chicken breasts which are cut into slices or cubes. I, however, used chicken thighs, which I cooked on the stove top, let cool, then hand shredded. Of course, if you prefer chicken breast, by all means use them. And if you prefer your salad to look less rustic, then of course you can cut the chicken into cubes. However, I love chicken thighs because they have far more flavor and stay super moist. In fact, I cook them with bone in and skin on, then remove both once the thighs are cooked. Then I hand shred them. Yes, a little rustic, but the salad dressing seems to stick better to the shredded chicken.

I also used only sour cream in the salad dressing. You could use yogurt, mayonnaise or a mix of the three, but I happened to have sour cream on hand and it turned out great!

This is a really great salad to make as a meal for 2 or as a starter or side dish for 4. And because there are no "greens" this salad doesn't wilt in the fridge. In fact, it tastes better with age, so make it in advance and keep the leftovers for a quick lunch. It really couldn't be easier.

Chicken Waldorf Salad
Serves 2 as a meal or 4 as a starter or side

1 Apple, cored and cut into cubes (I prefer the tartness of granny smith)
3 ribs Celery, cut into 1 cm pieces
1/2 cup Walnut Pieces, lightly toasted
1 cup Seedless Grapes, cut in half
4 Chicken Thighs, with skin and bone
Salt and Pepper

For the Dressing:
1/3 cup Sour Cream
2 tbsp Lemon Juice
1 tbsp Lemon Zest
1 tsp Celery Seeds
Salt and pepper

Heat a pan over medium heat. Season the chicken thighs with salt and pepper and place skin side down in the heated pan. Let cook for about 4 minutes until the skin is brown and turn over. Cover and oook for 6-8 minutes until cooked through. Remove from pan and let cool to room temperature.

In a large bowl, mix all the salad dressing ingredients. Season to taste with salt and pepper. Add the cut apple, celery and grapes. Remove the skin from the chicken and remove the meat from the bone. Tear into pieces about the same size as the rest of the ingredients. Toss everything together.

At this point, I would refrigerate the salad until I am ready to serve it. Just before service, toss in half of the toasted walnuts. Then sprinkle the rest on top for garnish.

Sunday, December 12, 2010

Classic Apple Pie


My grandfather was a chef. I didn’t really have a chance to appreciate what that meant. What I mean is, his professional chef days were long over when I entered this world.  However, just the same, he always reminded us kids of his trade when we came for a visit. His apple pie. One of my favorite memories of my grandfather. He would bring it to the table and offer us kids a slice. And it was always the same. Warm, moist, cinammon-y and just darn good.


Now, I am not sure that I could ever replicate his pie. Maybe it's because it holds a very dear place in my heart, one that will never be replaced. Or maybe it's because I just can't do it.


Anyway, here is my version. It may not be exactly the same as his, but when I eat it, I feel at ease.  As if I am taken back in time to one of the hundreds of times in my childhood when I sat with my grandparents at their dining table and ate Apple Pie.


Classic Apple Pie
Makes 1 pie

6 large Apples, peeled and sliced
Juice of 1 Lemon
1/3 cup Sugar
1 tsp Cinnamon
2 Whole Cloves
1 tbsp Butter
1/2 tsp Cornstarch mixed with 1 tbsp Water

Pastry Crust
2 cups Flour
1/2 cup Whole Wheat Flour
1 cup Butter, cold and cut into chunks
1/4 tsp Salt
4-6 tbsp Ice Cold Water

For the Pastry Crust: In a food processor, combine the flours and salt. Add the butter and process until the mixture resembles oatmeal. Add the water, 2 tbsp at a time, until the dough just comes together. Divide into 2 and form each half into a disc. Wrap with plastic wrap and refridgerate for about 30 minutes.

Meanwhile, in a large bowl, dissolve sugar in lemon juice. Toss in sliced apples and sprinkle in cinnamon.

Melt the butter in a pan and add apple mixture. Cook for 5-8 minutes until apples are soft. Remove cloves. Stir in the cornstarch/water mixture. Remove from heat and let cool.

When you are ready to make the pie, roll out the refridgerated pastry dough, making 2 rounds. Place 1 on the bottom of a pie tin. Fill with the cooled apple mixture. Place the second round on top of the filling. Trim the edges of the crust and using a fork, press down on the edges of the crust to seal.

Bake in preheated 180 degree oven for 25-30 minutes until crust is golden.

Saturday, April 3, 2010

Recipes using Juicer Pulp: Apple Carrot Muffins


I have never been a big juice fan. I guess it’s the idea that when you drink juice, you get all the sugar and calories without the benefits of the fiber and other good stuff in the pulp. So, I always thought why not just eat the fruit or vegetable whole?

My reservations about juice were confirmed a few years ago when I got a juicer as a gift. I tried it once, felt that it was a lot of work and a lot of waste, and gave it away to my brother.

I mean, don’t get me wrong. Every once in a while I love to sip a glass of fresh, frothy juice. But I just didn’t see the point getting a juicer and making it a daily routine.

But today, well, I gave in. I got a juicer. And I was so excited about my new gadget that I started to juice everything in sight… apples, carrots, pineapple, oranges, grapefruits. The resulting juice was amazing. Sweet, fresh, foamy. And then I saw the pulp container. It was full! I couldn’t believe that a couple of glasses of juice could result in so much waste! So came my determination to find a way to use this pulp.

And here it is. The first of what will likely be many recipes for juicer pulp. And let me tell you… they were amazing! Cheers to juicing and all the waste that comes with it!

Of course, if you don’t have any pulp left over from juicing, you could just use fresh grated fruit and vegetables and omit the water in the recipe.

Apple Carrot Muffins
Makes 18 muffins

Dry Ingredients
2 cups Whole Wheat Flour
1/2 cup Brown Sugar
1 tsp Salt
2 tsp Cinnamon
1/4 tsp Nutmeg
2 tsp Baking Soda

Wet Ingredients
4 Eggs
1/2 cup Canola Oil
1/4 cup Water
2 tsp Vanilla Extract

1 1/2 cups Apple Pulp
1 cup Carrot Pulp

Preheat oven to 350 degrees. Line muffin tins. In a large bowl, mix together dry ingredients. In another bowl, beat eggs. Add oil, water, and vanilla. Add the egg mixture to the dry ingredients, stirring until just combined. Stir in the apple and carrot pulp. Fill muffin tins with mixture (you can fill them to the top as this mixture won’t rise much). Bake for 20 minutes. A toothpick inserted in the centre should come out clean.

Wednesday, February 3, 2010

Cinnamon Apple Galette & Mulberry Jam Galette


Tea for two. Sounds great right? The problem with tea for two is that you need some sweets to go with the tea. And, generally, I like to make these sweets myself. After all, there is nothing like a hot cup of tea and some fresh pastries to set the mood.

So, back to the dilemma… only two people. Need variety. Recipes too large. Don’t have time. What to do?


Well, here is an idea. Make a full recipe of pastry crust, and divide it into 2 to make to different desserts. I made 2 galettes which were so easy and which I baked together on the same sheet. You could also divide the dough and make 1 galette and 4-6 tarts for a different presentation. Up to you.

Cinnamon Apple Galette and Mulberry Jam Galette
Makes 2 Galettes that serve 2 for tea (generously!)

For the Whole Wheat Pastry Crust
1 1/4 cups Whole Wheat Flour
1/8 tsp Salt
1/2 cup Cold Butter, diced
3-4 tbsp Ice Water

In a medium bowl or a food processor, combine the flour and salt. Add the cold butter pieces and cut in using a pastry blender or by pulsing in the food processor.

Add ice water, 1/2 tbsp at a time until the dough forms into a ball. Gather into 2 balls and pat each one into a disk. Refrigerate the two dough discs for 30 minutes before rolling out.

When ready to use, roll out each disc on a lightly floured board until about 1/2 cm thick.


For the Cinnamon Apple Galette
Zest of half a Lemon
Juice of half a Lemon
2 tsp Sugar
1/4 tsp Cinnamon
1/4 cup Raisins
2 Large Apples, peeled and diced

In a medium bowl, mix together lemon zest, lemon juice, sugar and cinnamon. Add the raisins and the apples and toss to coat. If you can, let stand for about 30 minutes so the flavors can meld together.

Preheat the oven to
180 degrees Celsius (350 degrees Farenheit)..

Place 1 piece of the rolled dough onto a parchment lined baking sheet. Spoon the apple mixture onto the dough, leaving 4 cm border all the way around. Fold the border over the filling and press the overlapping dough together.

Bake for 25-30 minutes until tart is golden and filling is bubbly.


For the Mulberry Jam Galette
Zest of half a Lemon
1/4 cup Mulberry Jam (or any other fruit jam)
Mint leaves for garnish

Preheat the oven to
180 degrees Celsius (350 degrees Farenheit)..

Place 1 piece of the rolled dough onto a parchment lined baking sheet. Spread the jam onto the dough, leaving 4 cm border all the way around. Fold the border over the filling and press the overlapping dough together. Sprinkle with lemon zest.

Bake for 25-30 minutes until tart is golden and filling is bubbly. Garnish with mint leaves before serving.

Sunday, December 27, 2009

Sweet and Savory Popovers: Bacon, Onion & Tomato and Cinnamon-Apple Popover


They might be breakfast, brunch or dessert. They could be eaten alone, or dressed up with all sorts of toppings. Nope, I am not talking about pancakes. I am talking about popovers.

A popover is like a pancake that you bake in the oven. It gets all puffed up and golden brown, and has a soft texture in the middle. You can fill it with all sorts of stuff—sweet or savory.

I love recipes like this because you can really be creative and use whatever you have in your fridge. Also, there is no need to be exact with the fillings. Just add a little bit of this, and a sprinkle of that to create your perfect popover filling.

Today, I made 2 popovers: one sweet with Cinnamon and Apples and one savory with Bacon, Onions, and Tomatoes.

They were so delicious, and I have to say, these might become my new breakfast/brunch/lunch favorites. They have an amazing aroma in the oven and you can just increase the recipe depending on how many people you are feeding, and pop it in the oven. No more standing at the stove flipping pancakes all morning! Sorry pancakes! No hard feelings. I still love you…


Bacon, Onion, and Tomato Popover
Makes 1- 10 inch popover

For the Filling
4 slices Bacon, cut into strips
1/4 Green Onion, sliced
1/4 cup Tomato, diced

For the Batter
1/4 cup Whole Wheat Flour
1/4 cup White Flour
1/2 tsp Salt
2 Large Eggs
1/2 cup Milk

Chopped Parsley for Garnish

Preheat the oven to 220 degrees Celsius.

In a 10 inch, oven proof sauté pan over medium heat, cook the bacon until slightly crisp. Add the onions and tomatoes and cook for another minute until tomatoes are warm. In a separate bowl, mix together the flours and salt. Beat in the eggs and milk. Pour this batter over the filling in the sauté pan, and place in the preheated oven for 25 minutes until golden and puffy. Do not open the oven during the baking time or the popover won’t rise!

Garnish with some fresh chopped parsley.


Cinnamon Apple Popover
Makes 1- 10 inch popover

For the Filling
1 tbsp Butter
2 Large Apples, sliced
1 tbsp White Sugar
1/2 tsp Ground Cinnamon

For the Batter
1/4 cup Whole Wheat Flour
1/4 cup White Flour
1 tbsp White Sugar
1/4 tsp Salt
2 Large Eggs
1/2 cup Milk
1 tsp Vanilla Extract

Preheat the oven to 220 degrees Celsius.

In a 10 inch, oven proof sauté pan over medium heat, melt the butter and sauté the apples, 1 tbsp sugar, and the cinnamon until the apples start to soften (about 5 minutes). In a separate bowl, mix together the flours, sugar and salt. Beat in the eggs, milk and vanilla. Pour this batter over the apples in the sauté pan, and place in the preheated oven for 25 minutes until golden and puffy. Do not open the oven during the baking time or the popover won’t rise!

Enjoy warm with whipped cream or vanilla ice cream. You could even dollop some whipped cream and sprinkle fresh berries over top.

Wednesday, November 18, 2009

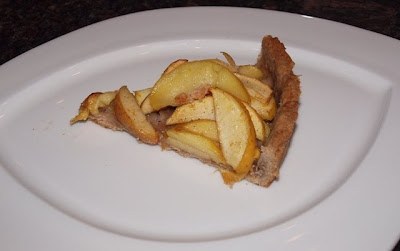
Apple Tart with Orange Zest & Cinnamon


Apple Pie. It’s a classic. Everyone has their favorite version. Mine is an apple tart flavored with orange zest and cinnamon. Need I say more?


(**In this case, I made a whole wheat pastry crust, but you could use a regular pastry crust. You can make it even easier by using store packaged puff pastry instead of making a crust. Just place it in the tart tin, prick it with a fork, and assemble in exactly the same way)


Easy Apple Tart with Whole Wheat Crust
Makes 1 tart

For Whole Wheat Pastry Crust
1 1/4 cups Whole Wheat Flour
1/8 tsp Salt
1/2 cup Butter, cut into cubes
3 tbsp Ice Water

The Filling
Zest of Half an Orange
Juice of Half an Orange
4 Large Apples, Cored and Thinly sliced (Peeled if you wish)
1/2 tsp Cinnamon
1 tbsp to 1/4 cup White Sugar (depending on the sweetness of your apples. For apples like Gala, Golden Delicious, Fiji, use around 1-2 tbsp. For tart apples like Granny Smith, use closer to 1/4 cup of Sugar)

In a food processor, mix together flour and salt. Add butter and pulse until the mixture resembles a course meal. Slowly add the ice water, pulsing just until the dough starts to stick together in a ball. Remove the dough from the processor, form into a ball, wrap in plastic wrap and refridgerate for at least 30 minutes before rolling out.

Preheat oven to
180 degrees Celsius (350 degrees Farenheit)..

In a large bowl, add zest, juice, apples, and cinnamon. Toss to coat apples.

Roll out pastry dough and place into tart pan (try to roll the dough so that it is a little larger than the tart pan, then trim off the excess. Do not stretch the dough into the pan, otherwise, it will shrink when it is baked).

Fill the tart shell with the apples (I like to do it in 2 layers).

Bake for 25 minutes until pastry crust is golden and apples have softened.
Serve with Vanilla Ice Cream or Whipped Cream.

Monday, November 2, 2009

Easy Sweet or Savory Crepes


Crepes are basically an unleavened French pancake. We usually pay a fortune for all different sorts of crepes in restaurants, cafes, and creperies, but what many of us don’t realize is that they are super easy and inexpensive to make. Also, all of the ingredients are pantry staples so this recipe doesn’t require a lot of forethought. As far as equipment goes, you really don’t need one of those fancy crepe pans that you see in the restaurants (unless of course, you want one!). All you need is a regular non-stick pan (of any size) and some kind of flipper or spatula.


Once you master the basic technique, you can use your imagination and fill them with just about anything. Think about all the different types of crepes you have eaten or seen on menus… sweet crepes like crepes suzette and savory crepes filled with spinach and ricotta.


Now think about all of your favorite things….Think Nutella, chocolate and marshmallows, smoked salmon with cream cheese and capers, lobster or even ice cream! Crepes are a clean canvas that you can dress up any way you like.

They are so versatile, you can use them at your dinner parties, or as a substitute for bread when you haven’t had time to run to the store.


This is really as easy as it gets. Crepes seem high maintenance, but really, they are very easy. You can make the batter up to 24 hours in advance (or maybe more, I never tried) and just put it in the fridge.

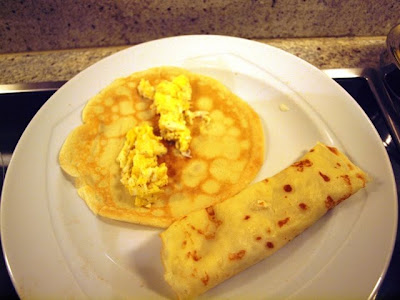
For my crepes, I made three different kinds: Nutella and Banana, Banana and Condensed Milk, and Scrambled Egg with Cheddar. You can use whatever fillings or toppings you like. Just to get you started, here are a few ideas...


Ideas for Savory Crepe Fillings:
- Ricotta Cheese and Spinach
- Scrambled Eggs with Cheese (and bacon)
- Ham and Cheese
- Smoked Salmon, Cream Cheese, Red Onions, Capers
- Tomato, Mozzarella, and Basil
- Grilled Veggies

Ideas for Sweet Crepe Fillings:
- Nutella & Banana
- Nutella & Marshmellows
- Fruit Jam
- Fresh Fruit with Whipped Cream
- Sauteed Apples, Peaches, or Pears
- Ice Cream or Sorbet


Easy Sweet or Savory Crepes
Serves 2
(makes 8 crepes using a 8 inch pan)

1/2 cup Flour (you could use whole wheat if you like)
1 Egg
1/2 cup Milk
1/4 cup Water
1/8 tsp Salt
1 tbsp Butter, melted
Optional: 1 tbsp Sugar (for sweet crepes)

Just a note: for sweet crepes, you can add 1 tbsp of Sugar in with your batter to sweeten it up a little. My husband loves his batter with this little bit of sugar. For me, I like to skip it and keep my crepe batter versatile. Then I can use the same crepes for sweet and savory!

In a large mixing bowl, combine all ingredients (including optional sugar) except melted butter and beat well until smooth and combined. (If you are making ahead, cover and place the bowl in the fridge for up to 24 hours)

Add melted butter and beat well.

Very lightly grease a non-stick frying pan over medium heat (I like to use butter because of the flavor). Slowly pour the batter into the pan, tilting the pan so that the batter coats surface evenly. Be sure not to pour too much batter. You just want enough to coat the pan.

Cook for about 2 minutes on each side, until just brown. Remove from pan and fill with your preferred fillings. Serve flat with toppings, folded over, or rolled.

Friday, October 16, 2009

Healthy Brown Rice Pudding with Apple Compote


Healthy Rice Pudding? Is that possible? I mean, when I think of rice pudding, I think of a creamy and rich bowl of sweet rice. The last thing that comes to my mind is healthy.

Well, I think I have found an answer with this healthier (and tastier!) version of this heart-warming dessert. I used brown rice with low fat milk and much less sugar than other recipes would call for. I also made use of some beautiful fall apples, which I cooked down to bring out their natural sweetness. Give it a try and let me know what you think!


Healthy Brown Rice Pudding with Apple Compote
Makes 4 servings

For the Rice Pudding
3 cups Low Fat Milk
4 slices Fresh Ginger Root
1/2 cup Brown Rice
1 tablespoon White Sugar
1 tsp Vanilla Extract

For the Apple Compote
3 Large Apples, diced (Any kind. I used a mix of Golden Delicious and Red Delicious). I don’t peel them, but you can if you want)
2 tbsp Butter
3 tbsp Brown Sugar
1 tsp Cinnamon
¾ cup Golden Raisins

To make the rice pudding, put the milk, ginger, rice, sugar, and vanilla into a heavy bottomed sauce pan on med-high heat. As soon as the milk starts to bubble, reduce the heat to low, cover, and simmer for about 50 minutes, stirring a few times during cooking.

Meanwhile, in a large sautee pan, melt the butter over medium-high heat. Add the diced apples, sugar, and cinnamon and sautee for about 5 minutes, stirring frequently. Reduce heat to low, cover, and let cook for about 20 minutes. After 20 minutes, stir in the raisins. Cover and let cook on low heat for another 15-20 minutes until the raisins are soft. Remove from heat and leave covered.

When the rice has cooked for 50 minutes, remove from heat, and let it sit, still covered for about 5 minutes. After 5 minutes, remove the ginger pieces. Stir the rice pudding and adjust the thickness with milk if necessary. I usually stir in between ¼ to ½ cup more milk at this stage so that the pudding is thick and creamy.

Serve the rice pudding topped with the apple compote.

Friday, October 2, 2009

Apple-Cinnamon Oatmeal Cookies


I wanted to bake cookies today, but I wanted try something a little different. My “go to” cookie recipe in times of need is always my delicious and sought after Chocolate Chip Cookie recipe; however, today my heart was set on oatmeal. This left me with so many decisions to make. Plain Oatmeal? Oatmeal and Chocolate Chip? Oatmeal Raisin? Peanut Butter Oatmeal?

They all sound good, but today’s winner is… Apple-Cinnamon Oatmeal Cookies.


There is nothing like an oatmeal cookie with that beautiful cinnamon aroma and those sweet little apple morsels embedded in it. And what makes this cookie so special is that it’s not hard and heavy. It’s soft and chewy, thanks to the combination of baking soda and baking powder. Goes great with a cup of tea, or sandwiched around a scoop of vanilla ice cream for dessert. Oh so satisfying (and not that bad for you either)!


Apple-Cinnamon Oatmeal Cookies
Makes approx 20 cookies

Dry Ingredients
3/4 cup White Flour (you could use Whole Wheat if you like)
1/2 tsp Salt
1/2 tsp Baking Soda
1/4 tsp Baking Powder
1 tsp Ground cinnamon
1 1/2 cups Quick Cooking Rolled Oats

Wet Ingredients
1/4 cup Butter, room temp
1/3 cup Brown Sugar
1/4 cup Honey
1 Egg, room temp
1 tsp Vanilla Extract

Other
1 /2 cup Fresh Apple, peeled and cut into small dice (If you prefer, you could substitute raisins or nuts. If you want to substitute chocolate chips, omit the cinnamon)

Preheat oven to 180 degrees C/350 degrees F.

Combine all dry ingredients in a bowl.

Cream together the butter and sugar. Add the honey, egg, and vanilla and beat well.
Add the dry ingredients to the wet and mix until combined. Gently stir in the fresh apple (or substitutions).

Drop by heaping tablespoon onto the cookie sheet. Bake for 12 minutes until golden. Cool on a wire rack.

Serve alone or with some Vanilla Ice Cream!

Sunday, July 19, 2009

Amazing Camping Food- Part 3


So, more about my method of "Wrap-it-in-tin-foil-and-chuck-it-in-the-fire."

As I mentioned previously, this works with pretty much anything. The idea is slow cooking over an open fire while you get on with setting up or tearing down camp, playing with the dog, hiking or playing cards. Plus, there is the added bonus of good tasting camping food!

In this post, I will go through this method using 2 more examples (for a 3rd example, see my previous post for roasted chicken) just to show you how versatile it is.


Campfire Baked Potatoes with Cheddar

Large baking potatoes
Cheese, sliced or grated
Salt and Pepper
Butter

This is the easiest and most satisfying camp food ever!

Wash the potatoes and then wrap them individually in tin foil.

After you start your campfire, place the wrapped potatoes at the edges of the fire, so that they get the heat but are not directly in the flame. Let the bake there while you prepare all your other food, go for a hike, or do something else (they need about 1 hour to 1.5 hours).

Once the potatoes are tender, remove them from the fire, slice them in the middle, and stuff with cheese. Season with salt and pepper. Wrap them again in the tin foil and place again in the fire for about 5 minutes, just until the cheese is melted. Remove from the fire, add a spoon of butter, and enjoy!

Alternatively, if you have a campfire at lunch to make the toasted ham and cheese sandwiches, just as the campfire is dying down from lunch, wrap the potatoes and place them in the glowing embers of the fire. Leave them there until dinner time. At dinner time, remove from the fire pit and build your campfire. When you are ready to eat them, stuff with cheese, throw them back in the fire, and enjoy!


Yum Yum Yum....and if that didn't just wet your appetite, this next recipe for Warmed Baked Apples filled with Nutella certainly will!


Warm Baked Apples filled with Nutella

Apples (any kind)
Nutella

Wash the apples. Cut off the top of the apple and remove the core, but ensure not to puncture the apple all the way through.

Fill with nutella. Place the top back on the apple. Wrap tightly with tin foil.

Place in the glowing embers of the campfire, not in the flame. Allow the apple to bake for about 30-45 minutes (while you are cleaning up from dinner, relaxing by the fire, doing the dishes, playing cards). When you remove the apple from the fire, it should be fork tender and melting in your mouth. Enjoy!