Search My Blog

Showing posts with label jam. Show all posts

Thursday, December 12, 2013

Nutella Pinwheel Cookies


'Tis the season for cookies and cookie swapping! Every year, my sister and I host a cookie swap. Each of the attendees bakes enough of one kind of cookie to give half a dozen to each person. That means, if there are 10 other people, you arrive with 5 dozen of the cookies you baked and leave with 5 dozen cookies that are 10 different varieties! 

I love this event, especially this year when I am crunched for time with a newborn. Essentially, I can make 1 type of cookie and end up with 10 kinds, many of which I have never tried before! 

This year, I wanted to make a simple cookie and one that I could make ahead. That way, I could make the dough at any point in the month leading up to the cookie swap, and bake them fresh the day before. I though the perfect choice would be a sliced icebox cookie. 

The tough decision was the filling. I was toying with making a cranberry orange compote for the inside or using my favorite jam, and then it hit me. Nutella. Who doesn't love Nutella? So, the nutella pinwheel cookie was born.

Saturday, August 31, 2013

Buttermilk Waffles


Nothing like an amazing breakfast to start off a long weekend!

What is your favourite breakfast? For me, it is usually something savory with eggs, bacon, sausages and good bread; however, I have taken a liking lately to pancakes and waffles, which my husband adores. Especially waffles, now that we have our own waffle iron. 

I got a waffle iron for my husband for Christmas. Unlike many households, who have an electric countertop waffle iron, I did not want yet another single use appliance sitting on our counter top. So I found a stove top waffle iron which is fantastic. Use it on the stove like a pan, then put it away. It takes very little space and it works great! No need to search for an electrical outlet or clear the counter to make space for it!

Saturday, December 29, 2012

Linzertorte- Austrian Jam Tart


Most of my recipes for the holidays have some sort of family history. Either it's something my mom made when I was a child, or something that a relative would bring to the table every year.

The Linzertorte, however, is an exception. I have no idea when and why I started to make it, but I absolutely adore this dessert.

A Linzertorte is actually an Austrian dessert named after a city in Austria. It's a super easy tart to make because the pastry is pressed into the tart pan instead of rolled and the filling is jam. It's not too sweet but just sweet enough because of the jam, and the subtle spices, hint of lemon and nuttiness make it a perfect holiday dessert (or if you are my husband, you eat it for breakfast too!).

Tuesday, June 26, 2012

Apple, Craisin & Walnut Galette


So a galette is pretty much a free form pie. Okay, it's a lazy pie. It's all the deliciousness of a pie crust and the filling, without having to make it fit the pie tin and making a top crust. 

Having said that, I don't feel the slight bit guilty for making a galette. In fact, it's the perfect, quick, rustic end to a home cooked meal and it seems much less work and much less daunting than making a pie. You can fill it with whatever your heart desires, or whatever you have just kicking around in your fridge. Some great examples would be frozen fruit tossed in some cornstarch and sugar, some fresh sliced peaches or apricots, or a thick spread of your favorite jam.

Oh, and the best part is, there is no leftover, wasted dough. Nope, you roll it all out, put on your filling, and just fold it over. Easy as pie!

Apple, Craisin & Walnut Galette
Makes 1 Galette

For Whole Wheat Pastry Crust
1 1/4 cups Whole Wheat Flour
1/8 tsp Salt
1/2 cup Butter, cut into cubes
3 tbsp Ice Water
(**In this case, I made a whole wheat pastry crust, but you could use a the same recipe with white flour)

1 Egg beaten with 1 tsp of water (Eggwash)

For Filling
2 Apples, sliced
Zest and Juice of 1 Lemon
1/2 cup Walnut Pieces
1/3 cup Craisins
1/4 cup Brown Sugar
3 tbsp Plain Yogurt
2 tbsp Butter

Preheat oven to 375 degrees Fahrenheit.

Make Pastry Crust
In a food processor, mix together flour and salt. Add butter and pulse until the mixture resembles a course meal. Slowly add the ice water, pulsing just until the dough starts to stick together in a ball. Remove the dough from the processor, form into a ball, wrap in plastic wrap and refridgerate for at least 30 minutes before rolling out.

Filling and Baking
In a bowl, stir together apples, lemon juice and zest, walnuts, craisins and brown sugar.

Roll out pastry dough to about 1/4 cm thickness. Place on a a parchment or greased baking sheet. Put the yogurt on the dough and spread in the centre, leaving a 2 inches border around the edge of the crust clear. Place the apple mixture on top of the yogurt. 

Rustically fold over the borders of the pastry (about 1 to 1 1/2 inches all around), pressing down to seal it around the filling. Brush with the egg wash. Place spots of the butter onto the filling. Bake for 35-40 minutes until golden brown and bubbly.

Tuesday, February 7, 2012

Jam Crumble Bars


Everyone needs a quick and easy "go-to" dessert. For those times when you want something other than ice cream or cookies, but don't feel like full out baking. For example, when you are weeknight entertaining. Or as a sweet ending to a relaxed brunch. 

These jam crumble bars have it all. They can be cut into bars and thrown into a lunch bag, eaten as a sweet on the go breakfast, or plated, garnished and served as a homemade dessert (who wouldn't love this warm with a scoop of vanilla ice cream?). 

The other great thing about these bars is that they are pretty healthy. Made with whole wheat flour and oats, you really don't have to feel guilty about serving this to your kids or those who are watching their waistline. 

And you don't have to feel bad about leaving it on the counter and seeing your husband eat it for breakfast... 

Saturday, May 14, 2011

Peanut Butter & Jelly Thumbprint Cookies


I think Thumbprint cookies are my favorite kind of cookie. I love the way they look and the richness with the sticky sweetness of the filling.  

Every year, my mom makes them at Christmas time, rolled with sesame seeds and filled with red jam (for my mom's thumbprint cookie recipe, click here).

And I often take this recipe, and switch thing up, by rolling the cookies in nuts or sugar, or filling them with nutella or cream cheese.  Today, I am twisting this idea even further by playing with the classic combination of peanut butter and jelly.

I mean, who doesn't like peanut butter and jelly? And in a cookie, it's got to be a winner!

Peanut Butter and Jelly Thumbprint Cookies
Adapted from www.joyofbaking.com
Makes about 30 cookies

1/2 cup Butter, room temperature
3/4 cup Smooth Peanut Butter
1/3 cup Brown Sugar
1/3 cup White Sugar
1 Large Egg
1 tsp Vanilla
2 tbsp Milk
1 1/2 cups Flour
1 tsp Baking Soda
1/2 tsp Salt
Jam
Sugar for rolling

Preheat the oven to 375 degrees. Line baking sheets with parchment paper.

In a large bowl, beat together butter, peanut butter, brown and white sugars until fluffy. Beat in the egg, vanilla and milk. Sift in the flour, baking soda, and salt and stir to incorporate.

Roll the dough into 2 cm balls. Roll in white sugar and place on lined baking sheet. Bake for about 8 minutes, pull out of oven, and using your thumb or the end of a wooden spoon, press to form holes in the centre of the cookies. Fill with jam and bake again for about 5 minutes.

Cool on a wire rack.

Sunday, September 26, 2010

Peach Jam


I am really into jam right now. Actually, more into making it than eating it to be honest.

I did make some strawberry jam a few months ago without pectin. This works very well, but I still prefer the consistency with the pectin. I just didn't have any at the time.


Then, I got my hands on some and made Fig Jam. I decreased the sugar, doubled the pectin, and found it to be a nice consistency and overall, very tasty. I would prefer the jam, however, with even less sugar. That's just my preference. My husband would probably disagree.

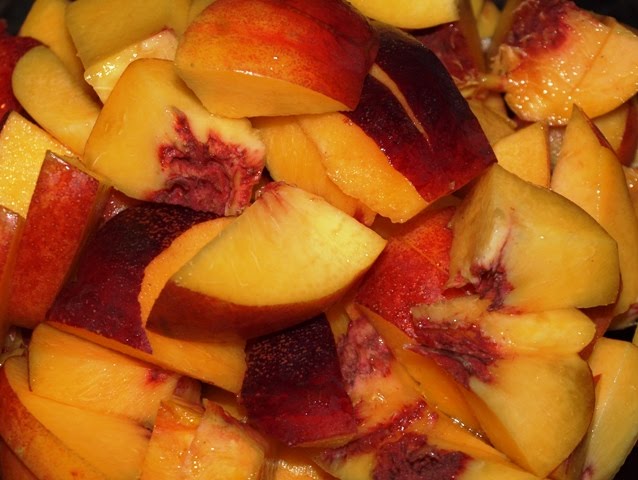
So, I made some peach jam today. Decreased the sugar, threw in a cinnamon stick, and it turned out beautifully. Like I said before, I had to use 2 packages of pectin to get the consistency I like. This could be because of the amount of sugar I use. You will need to try for yourself.  Most jams use equal amounts of sugar and fruit. I use less than half. You can start with however much sugar you like and 1 package of pectin. Once you boil it, taste it, then test the consistency. Add more sugar or pectin as necessary.

Once you have the method, I think you will find yourself making more jam that you can eat! I hope you have a husband like mine that eats his way through jars at a time!


Peach Jam
Makes about 4 jars of jam

1 1/4 kg Peaches (to make about 1 kg of pitted and cubed fruit, pitted and cut into pieces--not necessary to peel the peaches)
1/2 cup Water
2 packages Pectin
3/4 cup Sugar (about 165 grams)
1 stick Cinnamon
4 Sterilized Jam Jars

Place peaches and water into a large pot. Cover and cook on medium heat for about 10 minutes. Mash gently.

Add about 1/4 cup of sugar to the pectin. Stir the pectin/sugar mixture into the peaches. Cook for 5 minutes.

Stir the remaining sugar into the peach mixture. Add the cinnamon stick. Cook for another 5 minutes.

Take a small amount of jam out with a spoon and let it cool. If the jam is too runny, add in another 1/2 package of pectin, boil for 2 minutes, then check the thickness again.

Once you are satisfied with the thickness of the jam, skim the foam from the jam, stir the jam, and proceed to fill the sterilized jam jars. Fill the jars until they are about 1/2 cm from the top. Wipe the top of the jar clean and close with the lid.

Place the filled and closed jars into about 5 cm of boiling water and boil for 7-10 minutes. Pull the jars out of the water and let cool in a draft free place. Do not touch or move. Once they are cool (usually takes 1 day), check that the jars are properly sealed (the lid should be sucked in).

Store for 12-18 months in a cool place. Once opened, place in the refrigerator.

Tuesday, September 21, 2010

Fig Jam


Tis the season for fresh figs. So, what better way to preserve the freshess of the season than to make jam.

This jam tastes great on its own, with Homemade Peanut Butter, or as a compliment to cheese.


To be honest, I don’t like my jam to be too sweet, so I cheat and use less sugar and more pectin and somehow, it works.


Fig Jam
Makes 5-6 jars of jam

About 2 kg Fresh Figs
1/4 cup Fresh Lemon Juice
3/4 cup Water
2 packagea Pectin
1 kg Sugar (about 5 cups)
6-8 sterilized Jam Jars (see below)

Wash the figs, and remove the stems and the bottoms. Peeling the figs is optional (I don’t peel them unless they are damaged). Just note, that you should end up with about 1.7kg of cleaned fruit.

Place the figs in a large pot, add the lemon juice and water, cover, and boil for about 3 minutes. Mash the figs with a potato masher.

Mix package of pectin with about 1/4 cup of the sugar.

Add the pectin/sugar mixture to the figs and boil for another 3 minutes.
Add the rest of the sugar, and boil for 5 minutes. Take a small amount of jam out with a spoon and let it cool. If the jam is too runny, add in another 1/2 package of pectin, boil for 2 minutes, then check the thickness again.

Once you are satisfied with the thickness of the jam, skim the foam from the jam, stir the jam, and proceed to fill the sterilized jam jars. Fill the jars until they are about 1/2 cm from the top. Wipe the top of the jar clean and close with the lid.

Place the filled and closed jars into about 5 cm of boiling water and boil for 7-10 minutes. Pull the jars out of the water and let cool in a draft free place. Do not touch or move. Once they are cool (usually takes 1 day), check that the jars are properly sealed (the lid should be sucked in).

Store for 12-18 months in a cool place. Once opened, place in the refrigerator.

Sterilizing the Jars

I have always reused jars for jam rather than buying proper jam jars. As long as you sterilize them properly, this should not present a problem.

I choose jars that have popping lids.

Wash them with soap and water as usual. Then boil the jars in water for 10-15 minutes. Turn off the heat and remove the jars and place upside down on a rack to dry slightly (but do not let them cool all the way). Place the lids in the still hot water for about 10 minutes. Remove onto the rack.

Wednesday, February 3, 2010

Cinnamon Apple Galette & Mulberry Jam Galette


Tea for two. Sounds great right? The problem with tea for two is that you need some sweets to go with the tea. And, generally, I like to make these sweets myself. After all, there is nothing like a hot cup of tea and some fresh pastries to set the mood.

So, back to the dilemma… only two people. Need variety. Recipes too large. Don’t have time. What to do?


Well, here is an idea. Make a full recipe of pastry crust, and divide it into 2 to make to different desserts. I made 2 galettes which were so easy and which I baked together on the same sheet. You could also divide the dough and make 1 galette and 4-6 tarts for a different presentation. Up to you.

Cinnamon Apple Galette and Mulberry Jam Galette
Makes 2 Galettes that serve 2 for tea (generously!)

For the Whole Wheat Pastry Crust
1 1/4 cups Whole Wheat Flour
1/8 tsp Salt
1/2 cup Cold Butter, diced
3-4 tbsp Ice Water

In a medium bowl or a food processor, combine the flour and salt. Add the cold butter pieces and cut in using a pastry blender or by pulsing in the food processor.

Add ice water, 1/2 tbsp at a time until the dough forms into a ball. Gather into 2 balls and pat each one into a disk. Refrigerate the two dough discs for 30 minutes before rolling out.

When ready to use, roll out each disc on a lightly floured board until about 1/2 cm thick.


For the Cinnamon Apple Galette
Zest of half a Lemon
Juice of half a Lemon
2 tsp Sugar
1/4 tsp Cinnamon
1/4 cup Raisins
2 Large Apples, peeled and diced

In a medium bowl, mix together lemon zest, lemon juice, sugar and cinnamon. Add the raisins and the apples and toss to coat. If you can, let stand for about 30 minutes so the flavors can meld together.

Preheat the oven to
180 degrees Celsius (350 degrees Farenheit)..

Place 1 piece of the rolled dough onto a parchment lined baking sheet. Spoon the apple mixture onto the dough, leaving 4 cm border all the way around. Fold the border over the filling and press the overlapping dough together.

Bake for 25-30 minutes until tart is golden and filling is bubbly.


For the Mulberry Jam Galette
Zest of half a Lemon
1/4 cup Mulberry Jam (or any other fruit jam)
Mint leaves for garnish

Preheat the oven to
180 degrees Celsius (350 degrees Farenheit)..

Place 1 piece of the rolled dough onto a parchment lined baking sheet. Spread the jam onto the dough, leaving 4 cm border all the way around. Fold the border over the filling and press the overlapping dough together. Sprinkle with lemon zest.

Bake for 25-30 minutes until tart is golden and filling is bubbly. Garnish with mint leaves before serving.

Wednesday, January 27, 2010

Thumb Print Cookies


These are definitely some of my favorite childhood cookies. Okay, forget childhood, they are STILL my favorite cookies. They remind me of Christmas, when my mom would make batches and batches of all sorts of cookies. Then after Christmas, I would sneak down to the deep freeze, and search through all the tins of frozen leftover cookies to find these ones.


My mom always rolled them in sesame seeds rather than nuts like in most recipes. And she usually baked them with the jam, usually strawberry. In my version, I baked them without the jam, then filled them before serving. I did this mostly so that I could freeze the leftover cookies and fill them with whatever inspired me later. In fact, since the making of these cookies, I have filled them with mulberry jam, homemade strawberry jam and of course, Nutella!

Thumb Print Cookies
Recipe Adapted from http://www.joyofbaking.com
Makes about 2 dozen cookies

1/2 cup Butter, room temperature
1/4 cup White Sugar
1 Large Egg, separated
1/2 tsp Vanilla extract
1 cup Flour
1/8 tsp Salt
1 cup Sesame Seeds, untoasted
1/2 cup Jam for filling

Preheat oven to 350 degrees F (177 degrees C) and place rack in center of oven. Line a baking sheet with parchment paper.

In a bowl, cream the butter and sugar until light and fluffy (2-3 minutes). Add the egg yolk and vanilla extract and beat until combined.

In a separate bowl, whisk together the flour and salt. Add the flour mixture to the batter and beat just until combined. If the batter is too soft to roll into balls, refrigerate for about 30 minutes.

In a small bowl, whisk the egg white until frothy. Place the sesame seeds on a plate. Roll the dough into 1 inch balls. Taking one ball of dough at a time, dip first into the egg white and then lightly roll in the seeds. Place on the prepared baking sheet spacing about 1 inch. Using your thumb or end of a wooden spoon, make a indentation into the center of each cookie.

At this point, if you want to fill and bake with jam inside, you can. Otherwise, you can fill the centers with jam before serving. This is best if you want to store the cookies for more than a few days as the jam will soften the cookies over time. Bake for about 13-15 minutes. Remove from oven and place on wire rack to cool.

Monday, January 25, 2010

Homemade Strawberry Jam


It’s really not that hard. Really! Don’t you believe me?

I completely understand that the idea of making jam is daunting. Especially after seeing people pull jars out of boiling pans of water with tongs and all this worry about food safety.


But I have found a solution. Make a small batch of this jam, put it in a jar in the fridge, and eat it all week. Then, do it again. It’s not hard. I promise.


Because, in this case, this isn’t an exercise in preserving fruit—it’s an exercise in soul therapy. The idea that every morning (or night) when you eat your toast with jam, that you are tasting your own sweet success. Oh, and did I mention you can eat this drizzled in yogurt or on sugar or shortbread cookies?


Plus, I made this jam super simple. It just uses fresh strawberries, sugar (and I might add here that I used MUCH less sugar than the normally recommended quantity which is equal to ½ of the amount of fruit you put in, which in this case would have been 350 grams!!!), and a little special touch…some lemon and lemon zest. What could be easier?

Homemade Strawberry Jam

Makes about 2 cups of Jam
750 grams Strawberries, washed with stems removed (make sure they are ripe)
100 grams White Sugar
Zest of ½ Lemon
Juice of ½ Lemon

Mash all ingredients together in a pot. Don't worry about the mixture being a little chunky! It will make nice fruit bits throughout the jam.
Simmer for 30 minutes, skimming occasionally. After 30 minutes, remove from heat and let cool for about 30 minutes. Put jam into clean jars and cool completely. Place lid on and place in the fridge. It’s that simple! Will keep for about 1 week.

Monday, November 2, 2009

Easy Sweet or Savory Crepes


Crepes are basically an unleavened French pancake. We usually pay a fortune for all different sorts of crepes in restaurants, cafes, and creperies, but what many of us don’t realize is that they are super easy and inexpensive to make. Also, all of the ingredients are pantry staples so this recipe doesn’t require a lot of forethought. As far as equipment goes, you really don’t need one of those fancy crepe pans that you see in the restaurants (unless of course, you want one!). All you need is a regular non-stick pan (of any size) and some kind of flipper or spatula.


Once you master the basic technique, you can use your imagination and fill them with just about anything. Think about all the different types of crepes you have eaten or seen on menus… sweet crepes like crepes suzette and savory crepes filled with spinach and ricotta.


Now think about all of your favorite things….Think Nutella, chocolate and marshmallows, smoked salmon with cream cheese and capers, lobster or even ice cream! Crepes are a clean canvas that you can dress up any way you like.

They are so versatile, you can use them at your dinner parties, or as a substitute for bread when you haven’t had time to run to the store.


This is really as easy as it gets. Crepes seem high maintenance, but really, they are very easy. You can make the batter up to 24 hours in advance (or maybe more, I never tried) and just put it in the fridge.

For my crepes, I made three different kinds: Nutella and Banana, Banana and Condensed Milk, and Scrambled Egg with Cheddar. You can use whatever fillings or toppings you like. Just to get you started, here are a few ideas...


Ideas for Savory Crepe Fillings:
- Ricotta Cheese and Spinach
- Scrambled Eggs with Cheese (and bacon)
- Ham and Cheese
- Smoked Salmon, Cream Cheese, Red Onions, Capers
- Tomato, Mozzarella, and Basil
- Grilled Veggies

Ideas for Sweet Crepe Fillings:
- Nutella & Banana
- Nutella & Marshmellows
- Fruit Jam
- Fresh Fruit with Whipped Cream
- Sauteed Apples, Peaches, or Pears
- Ice Cream or Sorbet


Easy Sweet or Savory Crepes
Serves 2
(makes 8 crepes using a 8 inch pan)

1/2 cup Flour (you could use whole wheat if you like)
1 Egg
1/2 cup Milk
1/4 cup Water
1/8 tsp Salt
1 tbsp Butter, melted
Optional: 1 tbsp Sugar (for sweet crepes)

Just a note: for sweet crepes, you can add 1 tbsp of Sugar in with your batter to sweeten it up a little. My husband loves his batter with this little bit of sugar. For me, I like to skip it and keep my crepe batter versatile. Then I can use the same crepes for sweet and savory!

In a large mixing bowl, combine all ingredients (including optional sugar) except melted butter and beat well until smooth and combined. (If you are making ahead, cover and place the bowl in the fridge for up to 24 hours)

Add melted butter and beat well.

Very lightly grease a non-stick frying pan over medium heat (I like to use butter because of the flavor). Slowly pour the batter into the pan, tilting the pan so that the batter coats surface evenly. Be sure not to pour too much batter. You just want enough to coat the pan.

Cook for about 2 minutes on each side, until just brown. Remove from pan and fill with your preferred fillings. Serve flat with toppings, folded over, or rolled.

Tuesday, February 24, 2009

T is for Tartine

Nutella & Caramelized Banana Tartine

If you are going to bake bread, then you had better understand the concept of tartine.

Definition: tar·tine (tär-tÄ“n') - A French open-faced sandwich, especially one with a rich or fancy spread. [French, from Old French, diminutive of tarte, tart.]
From: The New Food Lover's Companion, 3rd edition, by Sharon Tyler Herbst, published by Barron's Educational Series, Inc.

Well that's all fine and good, but what does that mean exactly? For me, it means the perfect balance of bread and spread. There are really an infinite number of possibilities, but I really believe that simplicity reigns in this case.

In its simplest of forms, a tartine could be composed of a slice of bread and butter (salted, of course). A little more intriguing would see the bread spread with Nutella. For a more worldly touch? Add Vegemite. As comfort food? Add PB & J. For a sophisticated feel? Add fig jam, crumbled blue cheese, walnuts, and a drizzle of honey.

A piece of bread can transport you to any place in the world, at any time of day, without a lot of effort. It is a medium by which to communicate flavors, bring back memories, and convey feelings.

Here are some of my all time favorites (in no particular order):


  • Nutella
  • Nutella with Caramelized Banana (slice the banana, sprinkle with sugar, and torch it!! or, broil it until caramelized)
  • Butter & Good Quality Shaved Dark Chocolate (shave it with a potato peeler or grate it)
  • Butter & Jam (I love St Dalfour Jamswhich are all natural, sugar free, meaning only natural sweetness!)
  • Cream Cheese, Thin Shaved Red Onion, Smoked Salmon (topped with caviar anyone??)
  • Grilled Chicken & Mango Chutney
  • Grainy Mustard & Emmental Cheese
  • Sliced Crisp Red Apple & Sharp Cheddar
  • Fig Jam, Crumbled Blue Cheese, Walnuts, and Honey Drizzle
The question now is: When does it become a sandwich??? Well, duh, when you add another slice of bread!

So why not? Why not rid ourselves of this confusing, half sandwich ''tartine" (a.k.a. "open faced sandwich) and give in to the conventional sandwich?

After much deliberation, here is my conclusion (and please, feel free to drawn your own)… as the tartine is a French term, and the French are known for richness and moderation, two slices of bread warrants more spread, more filling, and more calories to maintain the same balance of flavor and texture as the tartine while maintaining the svelte French figure (reference the book, French Women Don't Get Fat). Therefore, one slice is better. I mean, you have to remember also, we are not talking about your typical white sandwich bread here. We are talking about a thick slice of freshly baked, rustic country bread. With two slices, how would you fit it into your mouth? Let's go try....